Original Link: https://www.anandtech.com/show/1612
EasyShare DX7590: Kodak's Second Ultra-Zoom Digicam
by Stephen Caston on February 11, 2005 12:03 AM EST- Posted in
- Digital Camera
Index
The 5 megapixel DX7590 replaced the 4 megapixel DX6490 as Kodak's second 10x ultra-zoom digicam. The DX7590 features a Schneider-Kreuznach lens capable of a 38 - 380mm zoom (35mm equivalent). It offers a wide range of still recording modes from full auto to manual exposure in addition to 14 preset scene modes and a movie mode with a maximum resolution of 640x480. Like all of Kodak's EasyShare cameras, the DX7590 has an intuitive menu and controls that lead to a hassle-free shooting experience.In our review, we found that although the DX7590 has a lot going for it, it has some noteworthy downfalls as well. For example, it performed well with regard to color reproduction and shutter lag. However, the camera really slows down when the buffer fills up. The most significant problem with image quality is that the DX7590 uses a very aggressive noise-reduction process that results in a soft/muddy appearance. Read on for all the details and a closer look at the performance of this ultra-zoom digicam.
Product Samples provided by Newegg.com
Kodak DX7590 Specifications
| Kodak DX7590 (Firmware Version 1.0100) |
|
| Release Date | August 2004 |
| Price | ~$430 |
| Pixel Count | 5.0 Million |
| Camera Type | Compact zoom |
| Highest Resolution | 2576x1932 |
| Lower Resolutions | 2576x1716, 2304x1728, 2048x1536, 1552x1164 |
| Sensor Type | CCD |
| Sensor Size | 1/2.5" |
| LCD Screen Size | 2.2" |
| Optical Zoom | 10x; 38 - 380mm equivalent |
| Digital Zoom | Up to 3x |
| Focus Range | W: 2.0' - Infinity; T: 6.6' - Infinity |
| Macro | W: 4.7 - 27.6"; T: 3.9 - 6.9" |
| Aperture Range | W: f/2.9 - f/3.7 |
| Shutter Speeds | 16 - 1/1000th sec. |
| Auto Focus | Yes |
| Auto Focus Type | Hybrid |
| Manual Focus | No |
| Lens Thread | Fits accessory lenses and filters |
| AF-assist Lamp | No |
| ISO | Auto, 80, 100, 200, 400; 800 (at 1.8 MP) |
| Flash | Built-in pop-up; flash sync |
| Flash Range | W: 2 - 16.1'; T: 6.6 - 12.1' (Auto ISO) |
| Flash Compensation | +/- 2 stops in 1/3 increments |
| Exposure Compensation | +/- 1 stop in 1/2 increments |
| White Balance | Auto, Daylight, Tungsten, Fluorescent, Open Shade |
| Bracketing | Yes, 0.3, 0.7, or 1.0 EV |
| Metering | Multi-segment, Center-weighted, Spot |
| Color Space | sRGB |
| Aperture Priority | Yes |
| Shutter Speed Priority | Yes |
| Manual Exposure | Yes |
| Continuous Drive | Yes, 2 fps for 5 frames (2576x1932) |
| Self-Timer | Yes, 10 sec. |
| Storage Method | SD/MMC, Internal |
| Storage Included | 32 MB internal |
| Compressed Format | JPG |
| Uncompressed Format | None |
| Quality Settings | Standard Fine |
| Video clips | 640x480 (12 fps), 320 x 240 (20 fps), w/sound, QuickTime MOV, unlimited duration |
| Battery Type | KLIC-5001 lithium-ion rechargeable |
| Charger Included | Yes, approx. 3 hours |
| PC Interface | USB |
| TV-out | Yes |
| Tripod Mount | Yes, metal |
| Weight (w/out battery or card) | 12.3 oz. |
| Dimensions | 99.6 x 81.2 x 79.9 mm |
| Included in the Box |
|
The Design: Kodak DX7590
 |
 |
| Click images to enlarge. | |
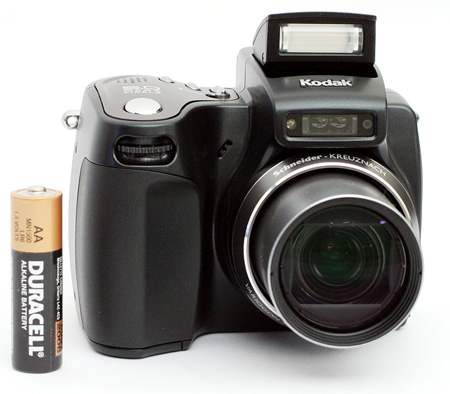
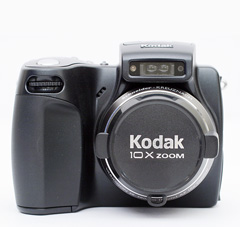
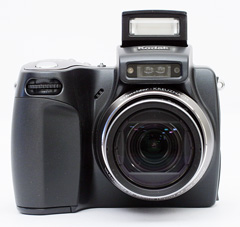
The front of the DX7590 features a powerful Schneider-Kreuznach 10x optical zoom lens with a 35mm equivalent zoom range of 38 - 380mm. The lens is protected by a removable lens cap that can be tethered to the camera body via the included cord. The lens is threaded and accepts a number of accessory filters and lenses. However, to use the lens accessories, you must first get a lens adaptor for around $20. Directly above the lens are the self-timer/video light and the hybrid AF (passive sensor). The hybrid AF sensor allows the camera to focus faster and in low light conditions. Directly above this is the built-in popup flash with a working range of 2 - 16.1' at wide angle and 6.6 - 12.1' at telephoto (using Auto ISO). The flash in this camera is considerably more powerful than average. On the left side of the front is a large handgrip with a groove for your fingers. In the dip between the handgrip and the lens is the built-in microphone. On the upper part of the handgrip is the "Jog dial", which can be pushed in as well as rotated left and right. This dial is used to set exposure compensation as well as advanced exposure settings.
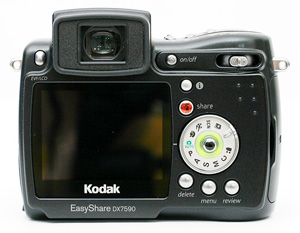
The first thing to notice on the back is the roomy 2.2" LCD monitor with 153,000 pixels. Directly above the LCD monitor is the EVF (electronic viewfinder) with a high resolution of 311,000 pixels. To the left of the EVF is the EVF/LCD toggle button, which is used to switch between the LCD monitor and the EVF. A diopter adjustment knob can be found on the left side of the viewfinder as well. On the opposite side at the top are the main power button and the zoom controller. The zoom controller is very responsive and has two speeds depending on how far it is pushed in each direction. Just below the zoom controller are 5 small bumps designed to help make the camera easier to grip with your thumb. Below this is the Mode Dial, which can be rotated to select the desired shooting mode. In the center of the Mode Dial is a multi-directional joystick. The joystick can also be pushed in to select menu items and settings. When the camera is on and the lens is extended, the area surrounding the joystick illuminates with a greenish yellow light. This light turns red in Favorites mode. Directly above the Mode Dial are the Status and Share buttons. Under the Mode Dial are three more buttons: Delete, Menu, and Review.
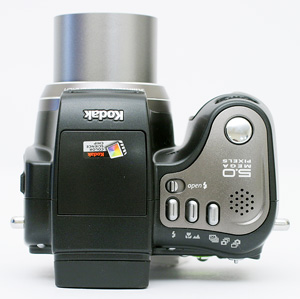
On top of the camera is the built-in flash, which pushes down into the camera body. To open the flash, you must slide the flash release button to the right. Just below the flash release button are three main function buttons: Flash, Close-up/Landscape, and Exposure bracketing/First burst/Last burst. To the right of these buttons is the speaker. Finally, at the upper-right is the shutter release button.
 |
 |
| Click images to enlarge. | |
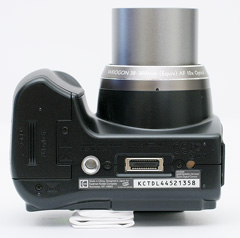
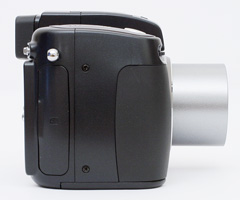
The bottom of the camera features a sliding hinged door that hides the battery compartment. The door has a sturdy feel to it unlike many cameras that we have tested before. The camera uses the supplied KLIC-5001 rechargeable lithium-ion battery 3.7V 1700mAh. Immediately to the right of the battery compartment is a metal tripod mount. Finally, below the lens is the connector for the EasyShare dock, which lets you charge the battery, print images, and transfer media to your computer.
 |
 |
| Click images to enlarge. | |
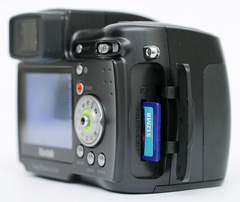
The right side of the camera features a hinged door that covers the SD/MMC flash card slot. The DX7590 does not come with a flash card, but the camera has 32 MB of internal memory. We highly recommend starting out with a 128 MB or larger SD card. Also on this side is a post for the included neck strap.
 |
 |
| Click images to enlarge. | |
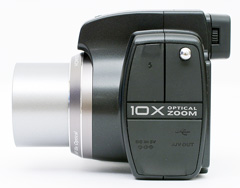
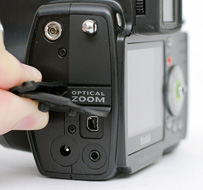
On the left side of the camera are two rubber flaps that snap in place to conceal multiple connections. The top left flap hides the external flash connector. The bottom flap covers a DC-in port for the AC adaptor, a USB port, and an A/V-out connector. The external flash connector has a 500 volt maximum.
Recording Features
In all recording modes, the Kodak DX7590 records images as JPEG files with quality settings: Standard or Fine. The resolution options are below:| Setting | Resolution (pixels) |
| 5.0 MP | 2576x1932 |
| 4.4 MP (3:2) | 2576x1716 |
| 4.0 MP | 2304x1728 |
| 3.1 MP | 2048x1536 |
| 1.8 MP | 1552x1164 |
By rotating the Mode Dial, you can select from a very wide array of recording modes. They are Auto, Program, Aperture-priority, Shutter-priority, Manual, Custom, Portrait, Sport, Scene, and Video. In Auto mode, the camera makes all the important exposure settings for you and offers very few adjustable options. For example, there are no options to adjust the ISO, metering, or focus zone settings. However, an exposure compensation can be applied up to +/- 2 stops in 1/3 stop increments by pushing in on the jog dial and rotating it left or right. By releasing the pop-up flash, a flash mode can be selected from the following: Auto, Fill, Red-eye, and Off. The Fill option forces the camera to fire the flash no matter what. A fill flash is often used in situations with backlighting in order to fill in details on your subject. The red-eye option will cause the camera to fire a pre-flash in order to dilate your subject's pupils. This helps to reduce the red-eye effect. As in all the still recording modes, the focus can be selected from Auto, Macro, or Landscape via the focus button (next to the flash button). In macro mode, the DX7590 can focus as close as 3.9". There are also several drive modes available by pressing the drive mode button (next to the focus button): exposure bracketing, First burst, and Last burst. The exposure bracketing option will make the camera take 3 pictures with different exposure values each time the shutter button is pressed. The exposure bracketing interval can be selected via the Menu from +/- 0.3, +/- 0.7, or +/- 1.0. For example, if the exposure compensation is set to "0.0" and the exposure bracketing interval is +/- 0.3, the resulting pictures will be - 0.3, 0.0, + 0.3 EV. By pressing the drive mode button twice, "First burst" will be selected. In First burst mode, the camera will take up to 5 pictures at 2 fps while the shutter button is held down. In "Last burst" mode, the camera will continue taking images at 2 fps for up to 15 seconds while the shutter button is held down. However, when the shutter button is released, the camera will save only the last 4 images taken to memory.
AF control can be selected via the Menu button from Single AF, Continuous AF, or Accessory Lens AF. With Single AF selected, the camera will only focus when the shutter button is half-pressed. When continuous AF is selected, the camera will focus on its own until the shutter button is half-pressed. At this point, the camera will attempt to lock the focus for the shot. With both Single and Continuous AF, the camera is able to use both TTL (through the lens) and hybrid focusing. However, only TTL focusing is available when an accessory lens is attached.
In Program, Aperture-priority, Shutter-priority, and Manual modes, there are several additional options available to the user. For example, in Program mode, the camera sets the appropriate exposure. However, the ISO setting can be selected from Auto, 80, 100, 200, or 400. When the resolution is set to 1.8 MP, ISO 800 will appear as an option as well. In Aperture and Shutter-priority modes, Auto ISO is not an option. When Aperture-priority is selected, the user sets the aperture value by pressing in on the jog dial and rotating it until the desired value appears. This same process is used to set the values in Shutter-priority and Manual modes.
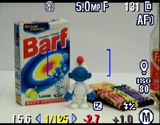 Under-exposed |
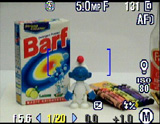 Good exposure |
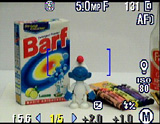 Over-exposed |
When setting the aperture and shutter speed in Manual mode, the current exposure condition will be indicated by a number under the exposure compensation icon. In the examples above, the camera indicates an underexposure by - 2.7 and an overexposure of + 2.0. As you can see, any number higher or lower than +/- 2.0 and the number will turn red to call attention to the photographer.
When the flash is enabled, a flash compensation can be applied up to +/- 1.0 in 0.5 EV increments. To do this, simply select the flash compensation field and push in on the jog dial. Then, rotate it to the left or right. Below are three tables outlining the options available via the Menu button. In Program, Aperture-priority, Shutter-priority, and Manual modes, all of the options below will be displayed. In all of the other still recording modes, the following items are unavailable: White Balance, Exposure Metering, Focus zone, Sharpness, and Reset.
| Record Menu (1/3) | |
| Self-timer | On, off |
| Picture Size | 5.0, 4.4 (3:2), 4.0, 3.1, 1.8 MP |
| Compression | Standard, Fine |
| White Balance | Auto, Daylight, Tungsten, Fluorescent, Open Shade |
| Exposure Bracketing Interval | +/- 0.3, 0.7, 1.0 |
We are a little disappointed to see that manual white balance is unavailable as an option. We would expect that a camera with manual exposure controls would also have a manual WB setting.
| Record Menu (2/3) | |
| Exposure Metering | Multi-pattern, Center-weight, Center-spot |
| Focus Zone | Multi-Zone, Center-Zone, Selectable-Zone |
| AF Control | Continuous AF, Single AF, Accessory Lens AF |
| Color Mode | High, Color, Natural Color, Low Color, Black & White, Sepia |
| Sharpness | High, Normal, Low |
If Multi-pattern metering is selected, the camera will measure light from the entire frame to determine the appropriate exposure. Center-weight metering uses light primarily from the center of the frame to calculate the exposure, while center-spot metering uses a very small portion of the center of the frame.
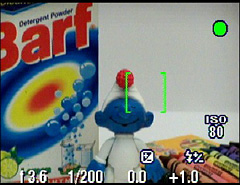 Multi-Zone AF |
 Center-Zone AF |
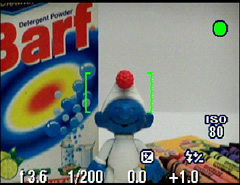
In all still-recording modes, when the shutter button is half-pressed, a set of brackets will appear on-screen to indicate the point of focus. In Auto mode, the camera always uses Multi-Zone AF. However, in the advanced exposure modes, Center-Zone AF or Selectable-Zone can be selected. With Selectable-zone, you can use the joystick to select one of three horizontal focus points.
| Record Menu (3/3) | |
| Reset | Continue, Cancel |
| Set Album (Still) | Clear All, Exit, Select |
| Image Storage | Auto, Internal Memory |
| Setup Menu | Enter |
The Reset option will reset the camera to its factory default settings. The Set Album option allows you to specify a name for the pictures that you are about to take. This can help keep them organized when you look through them later. The Image Storage option allows you to switch between using a flash card and the internal memory. The Auto option simply means that the camera will switch automatically to saving pictures/video clips to the internal memory if there is no card present.
 Auto |
 Advanced modes |
 No Info |
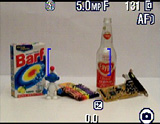
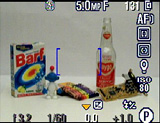
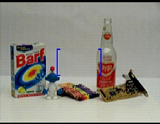
The LCD/EVF display can be toggled between two displays: one with shooting information and one that just displays the live image. While in Auto mode, the following information is visible while shooting: flash mode, resolution, quality, number of pictures remaining, storage, AF mode, exposure compensation, Auto mode icon, and aperture/shutter speed (on half-press). In the advanced recording modes, the following additional information can be seen: aperture and shutter speed (without half-press), flash compensation, ISO, Focus Zone, and Exposure Metering. We are a bit disappointed to see that a live histogram is missing from the feature set on this camera.
Custom recording mode offers an interesting mixture of control. Once Custom mode is selected via the Mode Dial, you can press the Menu button to select from Program, Aperture-priority, Shutter-priority, or Manual. Any changes that you make to settings will be remembered so that the next time you switch to Custom mode, all your last settings will be ready. This option comes in handy if you are frequently shooting with certain settings because you can just switch to Custom mode instead of readjusting all the individual settings. In Portrait mode, the camera will use a large aperture in order to keep the subject in focus and the background blurry. In Sport mode, the camera ensures a fast shutter speed to capture fast-paced subjects.
Scene mode on the DX7590 offers 14 different "scenes" from which to choose. Below is a table with information taken from the User's Guide explaining the settings used by each scene mode:
| Scene modes | |
| Close-up | Macro, Center-Weight Metering, Center-Zone Focus, ISO 100 |
| Landscape | Infinity Focus, Multi-Pattern Exposure Metering, Daylight White Balance, ISO 100 |
| Night Portrait | Multi-Pattern Exposure Metering, Multi-Zone Focus, ISO 140 |
| Night Landscape | Infinity Focus, Daylight White Balance, Center-Weight Metering, Daylight White balance, ISO 100 |
| Snow | +1 Exposure Compensation, Center-Weight Metering, Multi-Zone Focus, ISO 100 |
| Beach | +1 Exposure Compensation, Center-Weight Metering, Daylight White balance, ISO 100 |
| Text | Macro Focus, +1 Exposure Compensation, Center-Weight Metering, ISO 140 |
| Fireworks | 2-second exposure, Infinity Focus, Center-Weight Metering, Daylight White Balance, ISO 100 |
| Flower | Macro Focus, Daylight White balance, Center-Zone Focus, Center-Weight Metering, ISO 140 |
| Manner/Museum | No sounds, no flash, Multi-Pattern Exposure Metering, Multi-Zone Focus, ISO 100 |
| Self-Portrait | Macro Focus, Multi-Pattern Exposure Metering, Multi-Zone Focus, Red-Eye Flash, ISO 100 |
| Party | Multi-Pattern Exposure Metering, Multi-Zone Focus, Red-Eye Flash, ISO 140 |
| Children | Multi-Pattern Exposure Metering, Multi-Zone Focus, ISO 140 |
| Backlight | Multi-Pattern Exposure Metering, Multi-Zone Focus, Fill-Flash, ISO 100 |
It is important to note that in all modes, except Shutter-priority, Manual, and scene modes (Night Portrait, Night Landscape, and Fireworks), the camera is limited to 1/8th sec. as the slowest shutter speed. However, if exposure compensation is applied, the shutter speed can be as slow as 0.5 sec. In Night Landscape and Night Portrait modes, the shutter speed is limited to 0.5 sec. and in Fireworks mode, the shutter speed is fixed at 2 seconds. It is only in Shutter priority and Manual modes that the camera will allow a shutter speed as slow as 16 seconds.
Favorites mode lets you view pictures that you have tagged as "favorites". To do this, you simply press the "Share" button. Then tag the pictures that you like as "favorites". When transferring your pictures to your computer using the bundled EasyShare software, the camera will copy a smaller version of each favorite into the cameras internal memory. After this, you will only see your favorites when you switch to the Favorites mode.
The Final recording mode on the DX7590 is Movie mode. The camera can record video with audio at either 640x480 (12 fps) or 320x240 (20 fps). The video clips are recorded as MOV files and are only limited by the available remaining space. There are a couple of options available via the Menu button that are worth mentioning. For example, Continuous AF can be enabled or disabled. If it is disabled, the camera will lock its focus when the movie clip begins. Also, the Video Length can be selected from Continuous, 5, 15, or 30 seconds.
In all recording modes, the Setup Menu offers several options to adjust camera functionality. Below, we have broken these options down into three tables:
| Setup Menu (1/3) | |
| Return | Enter |
| Quickview | On, Off |
| Advanced Digital Zoom | Continuous, Pause, None |
| Print Warning | Pause, None |
| Sound Themes | Shutter Only, Default, Classical, Jazz, Sci-fi |
The Quickview option determines whether or not images and video clips will be displayed automatically after they are taken. If On is selected, an image/video clip will be displayed for 5 seconds after it is taken. During this time, you can press the Delete button to erase the image/clip without saving it to memory. The option Advanced Digital Zoom allows you to control the behavior of the digital zoom. If Continuous is selected, you can continue to hold the zoom controller in the telephoto position and the camera will switch over to the digital zoom when the optical zoom has reached its limit. If Pause is selected, you must let go of the zoom controller and then press it again to engage the digital zoom. The Print Warning is an interesting feature of the DX7590. If the Pause option is selected, the digital zoom will pause at the final point where an acceptable 4"x6" print could be made from the shot. To zoom in past this point, you must release the zoom controller and press it again. At this point, the zoom indictor will change from blue to red (indicating that image quality may not be acceptable for a 4"x6" print). The Sound Themes are simply preset sounds that play when the camera is turned on, the shutter button is pressed, etc.
| Setup Menu (2/3) | |
| Sound Volume | Off, Low, Medium, High |
| Mode Description | On, Off |
| Date & Time | Set |
| Video Out | NTSC, PAL |
| Orientation Sensor | On, Off |
The Mode Description option simply displays a short description of each mode when you switch to it. For example, when switching to Aperture-priority mode, it will say "Use for Aperture Priority settings". The Orientation Sensor options let you enable or disable the automatic rotation of portrait-style images.
| Setup Menu (3/3) | |
| Date Stamp | Off, Select |
| Video Date Display | None, Select |
| Language | Select |
| Format | Memory Card, Cancel, Internal Memory |
| About | "Kodak DX7590" "Firmware Version X.XXXX" |
For this review, we used Firmware Version 1.0100. The camera was shipped with Version 1.0000.
Playback Features
Unfortunately, there is no obvious way to power on the camera in playback mode without extending the lens. However, it can be done by setting the Mode dial to Favorites. Then, power on the camera and press review. To move to different pictures, simply press left/right on the multi-directional joystick.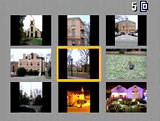 Image thumbnail view |
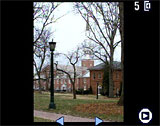 Image regular view |
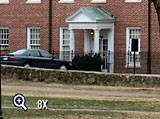 Image magnified 8x |
A thumbnail screen with 9 images can be displayed by pressing down on the joystick. In addition, an image can be magnified up to 8x in 1x increments by pressing the zoom controller in the telephoto direction. To jump back to a normal 1x display, press in on the joystick.
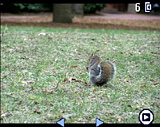 Default |
 No info. |
 Detailed |
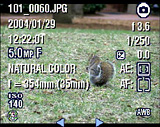
By pressing the Status button, the display can be selected from the following three types: default, no information, and detailed. The default screen will display the number of the picture out of the total number on the card/internal memory, the image location icon, a play icon, and two arrows. When the Status button is pressed, the screen is completely cleared of everything, but the image. Another press of the Status button will bring up a large array of details including file name, date, time, resolution, quality, color, focal length, ISO, flash, flash compensation, record mode, aperture, shutter speed, exposure compensation, metering, focus zone, and white balance.
An image can be deleted by highlighting it and pressing the Delete button. A Delete dialog will appear with the options "Picture", "Exit", and "All". By pressing the Share button while viewing an image, the following options will appear: Cancel Prints, Print All, Print, E-Mail, and Favorite. By selecting "Print All", the camera will tag all pictures for printing. Alternatively, you can select "Print" to set a specific number of copies for individual pictures. With the E-Mail option, you can tag images with specific email addresses so that they will be easy to locate later.
Battery Performance
Our general method for battery testing is to reset the camera to its default settings and change the recording mode to the highest quality option. Then, we take 5 pictures without the flash and 2 pictures with the flash until the battery is dead. For more information on our battery test, please refer to our Testing Procedures page. The battery was fully drained before charging for the test and the LCD monitor was on.| Number of shots taken in one battery charge | |
| Sony DSC-F88 | 1,480 |
| Kodak DX7590 | 1,217 |
| Canon PowerShot S60 | 1,040 |
| Nikon Coolpix 5200 | 965 |
| Pentax Optio X | 451 |
In our battery test, the DX7590 performed very well, taking 1,217 frames on a single charge. This number is above the average for other 5 megapixel cameras that we have tested. During more casual use of the camera, you probably won't achieve such high numbers as we did. However, you should certainly be able to take this camera on a weekend photo outing without worrying about the battery dying.
The Timing Tests
* NOTE: For all of our time tests, the camera is reset to its factory default settings and set to record using the highest resolution and quality setting. It is set to record in Auto mode. We also disabled all sounds. A PNY 512MB SD card was used.Before reading our results, please refer to our Testing Procedures page.
Startup Time
The startup time is recorded from the moment that the power button is pushed to the moment that the shutter sounds. The camera is set to record in Auto mode.| Startup time (seconds) | |
| Sony DSC-F88 | 1.73 |
| Nikon Coolpix 5200 | 3.34 |
| Pentax Optio X | 3.37 |
| Canon PowerShot S60 | 3.98 |
| Kodak DX7590 | 4.05 |
Although the DX7590 is not horribly slow, it does take longer to start up than other cameras that we have tested. We also found that there was no impact on startup time if the startup sound was enabled or disabled. On the bright side, the camera takes under a second to "wake up" from its standby mode. With such an impressive battery life, we recommend leaving the DX7590 powered on in situations where a "photo op" might arise.
Shutter Lag
To record shutter lag, we perform two tests with the lens at its widest angle setting. For the first test, we pre-focus the lens and measure the amount of time that it takes the camera to take a picture after the shutter button is pressed. The second test measures the time that it takes for the camera to take a picture after we press the shutter button without pre-focusing. Each test is performed 3 times and the results are averaged. For more information regarding our testing procedures, please refer to our Testing Procedures page.| With Pre-focus (seconds) | Without Pre-focus (seconds) |
| 0.07 | 0.54 |
With the camera pre-focused, the shutter lag time was a very fast 0.07 sec. When we included focusing in the equation, the camera performed well above average, resulting in a time of just 0.54 sec. The lag time is a bit longer toward the telephoto end, but it's certainly not slow. In short, we are very impressed with the shutter lag and focus times of the DX7590.
Write Times
We recorded 5 different write times with a PNY 512 MB SD card:Single Shot - The time that it takes for a single picture to be completely written to the flash card (the time that the "activity light" is on).
Shot To Shot (STS) - The time until the second shot can be taken after the first (shutter to shutter).
Shot To Shot w/Flash - The time that it takes the camera to take two pictures with the flash, starting from the moment that the first flash is fired to the moment that the second is fired.
Shot To Shot w/Buffer Full - The time between taking the last shot of a burst to the moment that the shutter sounds again.
Clear Buffer - The time that it takes the camera to clear the buffer after a full burst of pictures is taken.
We performed each test three times and averaged the results. Below are the resolution, quality setting, and average file size used for the tests.
| Resolution (pixels) | Quality setting | Avg. file size (MB) | |
| Flash disabled | 2576x1932 | Fine | 2.70 |
| Flash enabled | 2576x1932 | Fine | 1.75 |
| Single Shot | Shot to Shot | Shot to Shot w/Flash | Shot to Shot w/Buffer Full | Clear Buffer |
| 8.5* | 1.89 | 1.93 | 8.80 | 43.2* |
* NOTE: Since there isn't an activity light on the DX7590, the "Single Shot" and "Clear Buffer" times are calculated from the moment that the blinking activity icon appears on the LCD to the moment that it stops blinking.
Before the buffer fills with 5 shots, the DX7590 shows a very good write performance. The camera takes just 1.89 sec. between shots without the flash and 1.93 seconds with the flash enabled. The reason for the fast cycle time with the flash is due to a smaller average file size (1.75 MB). In "First Burst" mode, the camera can take 5 frames at 2.4 fps before slowing to 8.80 seconds between shots. When the buffer is full, it takes approximately 43.2 seconds to dump all the images to the flash card. It is a shame that the buffer works so slowly because the camera is fairly quick otherwise.
Resolving Fine Lines
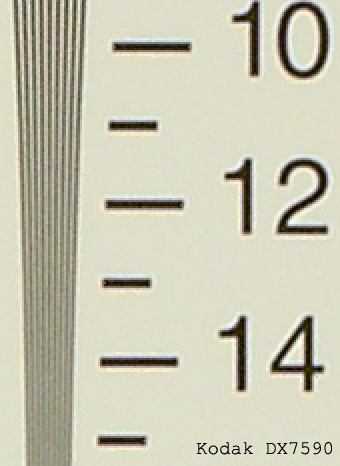
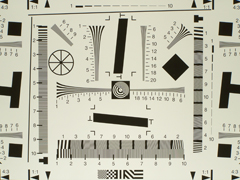
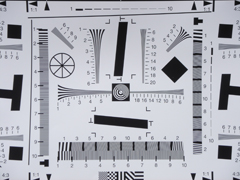
For our resolution test, we reset the camera to its default settings and then used the highest resolution and quality setting. The camera was then set to +1.0 E.V. For more information, refer to our Testing Procedures page. When reading this chart, the numbers represent lines per picture height (LPH). For example, the number 16 would represent 1,600 LPH. Below are 200% crops of the test. Click on a crop to see the full chart at 100%.We have selected the Sony DSC-F88 to use for comparison due to a similarly-sized sensor and megapixel rating.
| Kodak DX7590 | Sony DSC-F88 |
 +1.0 EV Click to download. |
 +1.0 EV Click to download. |
Roll your mouse over the crops below to see the difference between the Kodak DX7590 and the Sony DSC-F88 resolution charts.
In the horizontal crop above, the DX7590 shows strong line detail out until 1,100 LPH, which is a bit worse than what we are used to seeing for 5 MP cameras. The Sony DSC-F88 shows a more expected resolution of 1,300 LPH. In the vertical crop, the DX7590 does just a bit better, resolving lines out to 1,150 LPH before the lines are no longer distinguishable. However, the F88 again shows a significant advantage with detail out to 1,300 LPH. Overall, the resolution performance of the DX7590 isn't very impressive. We also noticed a significant amount of JPEG artifacts and halos along the test patterns as well as slight moiré in the extinction zone.
Color Reproduction
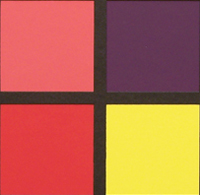
* For all of our color tests, we reset the DX7590 to its factory default settings. It was then set to record using the highest image quality option. All images are sRGB.We took a picture of our color chart using Auto and Tungsten WB settings. Click on a thumbnail below to view a larger image.
Tungsten light
| Auto WB | Tungsten WB |
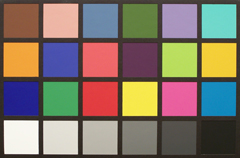 Click to enlarge. |
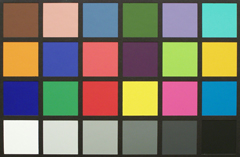 Click to enlarge. |
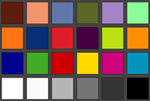 Reference Chart ("actual colors") |
|
| Auto WB | Tungsten WB |
 |
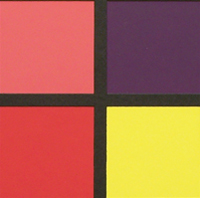 |
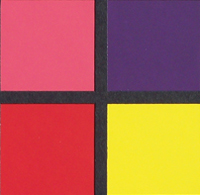
When the camera is set to Auto WB under tungsten light, our sample shows very accurate colors. With most cameras that we test, we expect to see a fairly strong yellowish cast. With the Tungsten WB setting, the colors are also very accurate.
Daylight
| Auto WB | Daylight WB |
 Click to enlarge. |
 Click to enlarge. |
 Reference Chart ("actual colors") |
|
| Auto WB | Daylight WB |
 |
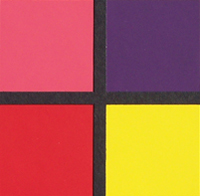 |
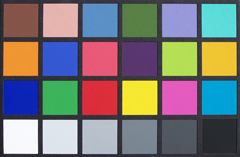
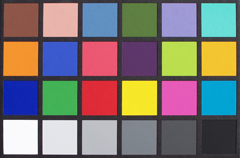
In direct sunlight, both the Auto and Daylight settings yield very accurate results. Overall, we are very impressed with this camera's white balance ability - particularly Auto WB.
Studio Shot
In this shot, we tested the camera's ability to reproduce colors in our studio shot using different WB settings under tungsten light.| Auto WB | Tungsten WB |
 Click to enlarge. |
 Click to enlarge. |
In our more casual studio shot with Auto WB, the DX7590 shows a bit more of a yellowish cast than it did with our color chart. With the Tungsten setting, this color cast is not a problem.
Built-in Flash
For the flash test, we set the camera to Auto mode w/Auto flash. The picture was taken from 5 feet away.In general, we are impressed with the color reproduction capabilities of the DX7590 with the flash. In the sample above, the skin tones are natural and well-saturated. However, we also noticed a very slight pinkish color cast on the white background.
Noise
The noise test consists of pictures of our studio shot taken at increasing ISO levels to show the effect on the image. The pictures were taken after resetting the camera to its factory default settings. The camera is then set to record with the highest quality option with Tungsten WB. Click on a 100% crop below to view the full-size image. All images are sRGB.| ISO 80 |  Click to enlarge. |
| ISO 100 |  Click to enlarge. |
| ISO 200 |  Click to enlarge. |
| ISO 400 |  Click to enlarge. |
As the crops above demonstrate, the DX7590 is able to produce acceptably low-noise images from ISO 80 through to ISO 200. The difference between ISO 200 and 400 is very striking. In the ISO 400 sample, there is a large loss of detail and clarity. In addition, discoloration begins to be a problem as red, green, and blue blobs are visible throughout the image.
| ISO 800 (1.8 MP) |
 Click to enlarge. |
Although ISO 800 is only available at a resolution of 1.8 MP, we have included the above sample. At ISO 800, the image is saturated with noise and details are very soft. In short, it is nice to have the option to shoot at ISO 800, but don't expect good looking prints (even at 4"x6").
General Image Quality
For these pictures, the camera was reset to its factory default setting. Then, it was set to its highest quality recording setting. The pictures were then taken in Auto mode unless stated otherwise. Click on a thumbnail to view the full-size image. All images are in sRGB color space. (ISO 80, 1/1000 sec., f/2.8) Click to enlarge. |
 (ISO 80, 1/800 sec., f/3.1) Click to enlarge. |
 (ISO 80, 1/800 sec., f/2.8) Click to enlarge. |
 |
 |
 |
 (ISO 80, 1/640 sec., f/2.8) Click to enlarge. |
 (ISO 140, 1/250 sec., f/3.5) Click to enlarge. |
 (P, ISO 80, 1/400 sec., f/3.7, +1.0 EV) Click to enlarge. |
 |
 |
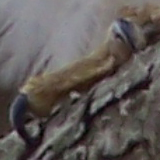 |
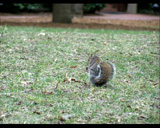
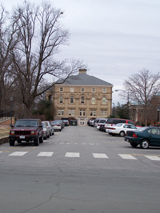
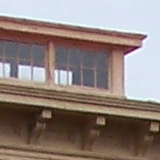
In the first two samples above, we can see that although the DX7590 is able to capture a decent amount of information, the fine details have a soft appearance. In addition, the first crop shows some JPEG artifacts along the edges of the window. We are a bit surprised to see JPEG artifacts at all when shooting with the highest quality setting. The next two samples demonstrate a fairly common problem of purple fringing with the DX7590. Although it won't be a major problem unless you plan on printing larger than 8"x10", it is an important issue to bring to light. In the fifth sample, the DX7590 shows off the capabilities of its 10x zoom lens capturing this unsuspecting squirrel. In the final sample, we were able to take a reasonable shot of this bird from approximately 25' away without getting attacked. In Auto mode, we found that the camera had trouble focusing on our subject. So, we quickly switched to Program mode with center-zone focus and applied a +1.0 EV compensation to counter the strong backlighting. Purple fringing is also quite evident in this shot.
Overall, the image quality of the DX7590 is pretty good. Despite the purple fringing and JPEG artifacts, the camera generally produces very good exposures without over-saturating/sharpening the images. The softness issue is most likely due to an aggressive noise reduction process. Although you shouldn't always expect ultra-crisp 11"x14" pictures with this camera, it can no doubt produce some very excellent prints up to 8"x10". It is really too bad that the JPEG compression is so high at the "Fine" setting because it results in some noticeable detail loss.
Night Shot
 ((Manual, ISO 80, 5 sec., f/3.1) Click to enlarge. |
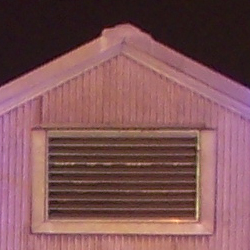 |
The DX7590 is only able to reach its longest shutter speed (16 seconds) in either Shutter-priority or Manual mode. In this shot taken in Manual mode, the camera handles noise very well. Unfortunately, JPEG artifacts are abundant along fine edges/lines in this shot, resulting in a significant loss of detail and clarity.
Movie Mode
 (640x480, 12 fps) Click to view. |
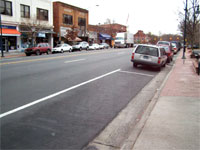
Other than the fact that the DX7590 can record unlimited video and audio at 640x480, the movie mode is rather disappointing. When set to 640x480, the video is very choppy due to its 12 fps capture ability. When the camera is set to record at 320x240, the clips become noticeably smoother with the video at 20 fps. Overall, however, we are disappointed with the slow frame rates.
Final Words
With the DX7590, Kodak has successfully packaged a tremendous array of features into an intuitive and powerful digicam. The DX7590 provides its users with a versatile 10x zoom lens and 9 recording modes, including 14 preset scene modes. After reviewing the DX7590, we find ourselves with mixed feelings regarding its performance. For example, when it comes to color reproduction, this camera is possibly the best that we've seen. The Auto white balance setting worked very well and the preset WB settings offer even better accuracy. Still, we would have liked to have seen manual WB as an option.The DX7590 has a very aggressive noise reduction process that indeed leaves images with very little noise. The downside to this is a significant loss of detail and clarity. In fact, we found that images from the camera tend to have a soft/muddy quality. On the topic of image quality, we were somewhat surprised to see JPEG artifacts in images taken at the highest quality setting. In addition, we found that purple fringing is a fairly common occurrence with this camera. With respect to speed, the camera is rather inconsistent. For example, it has a decent startup time and exceptional shutter lag times. In addition, cycle times are fast until the buffer fills up. At this point, the camera really slows down while the buffer empties data out to the flash card/internal memory.
In the end, this camera is certainly not suited for everyone. For example, if you are looking for a camera that can keep up with a lot of continuous shooting, the DX7590 will probably frustrate you with its leisurely buffer clearing time. However, if continuous shooting isn't your priority, the DX7590 is easily capable of making beautiful 8"x10" prints and offers flexibility of a 10x zoom and manual exposure controls.
| Pros | Cons |
| - Great 10x zoom range - Very accurate WB system - Good noise control - Very little shutter lag - Excellent battery life - Wide range of recording modes - EVF great for bright conditions |
- Soft/muddy images - Sluggish write times - JPEG artifacts - Purple fringing - No manual white balance - No histogram - Movie mode limited to 12 or 20 fps |
Thanks again to Newegg.com for loaning us the Kodak DX7590 for review.

